
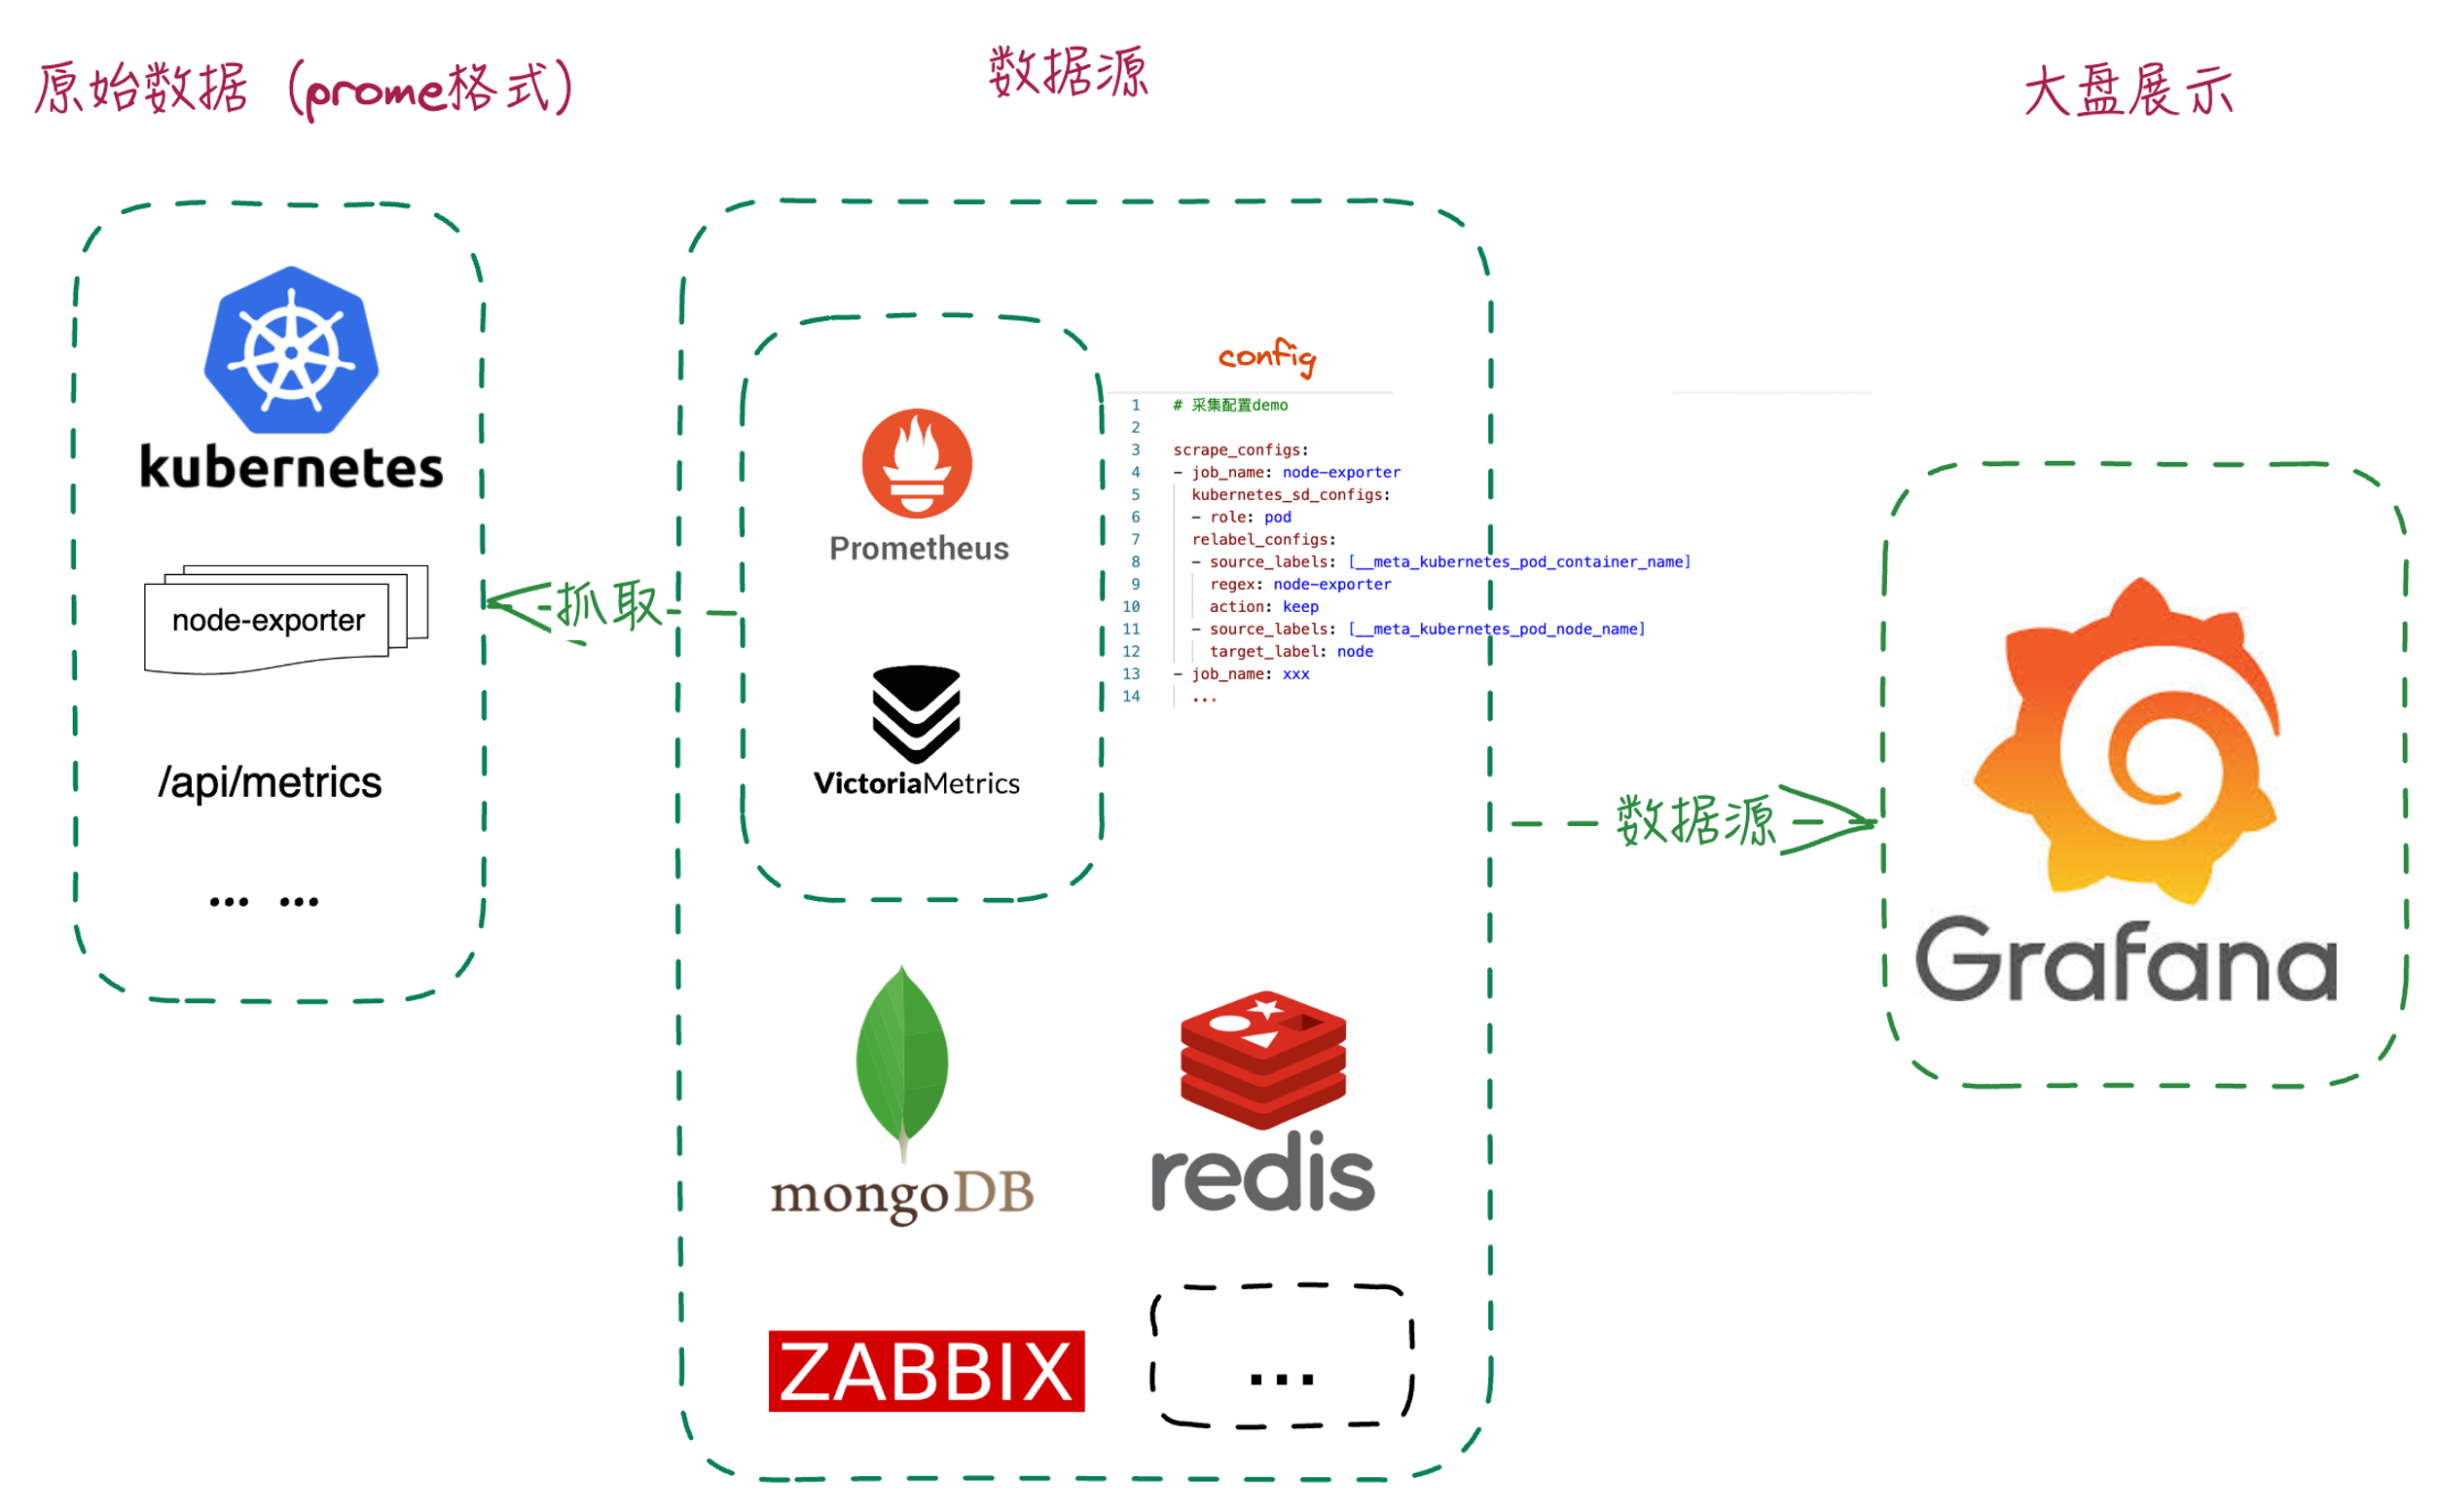
Prometheus 和victoriametrics 简单介绍
| 功能 | prometheus | victoriametrics | Grafana |
|---|---|---|---|
| 采集组件 | prometheus | vmagent | Grafana,只作展示,不做采集 |
| 告警组件 | alertmanager[可选] | vmalert[可选] | 组件自带 |
| 鉴权访问控制 | pushgateway[可选] | vmgateway[可选] | 组件自带 |
| 默认采集指标组件 | *_exporter [可选] | 无 | 添加数据源,通过QL查询作展示 |
| 查询语言 | PromQL | MetricsQL(兼容PromQL) | 支持PromQL、Lucene Query |
| 日志采集组件 | 无 | VictoriaLogs | Grafana Loki |
| 其他组件/信息 | https://prometheus.io | https://docs.victoriametrics.com/ | https://grafana.com/ |
moreinfo: https://landscape.cncf.io
ACME创建Let's Encrypt免费证书
创建证书步骤
前提: 设置域名A记录,同时放行安全组的80端口访问
官方文档: https://github.com/acmesh-official/acme.sh/wiki/How-to-issue-a-cert
-
安装acme.sh:curl https://get.acme.sh | sh
-
设置默认的ca:./.acme.sh/acme.sh --set-default-ca --server letsencrypt
-
创建证书:acme.sh --issue -d argo.zmq100.cn --standalone
另外用certbot 创建证书:https://www.runoob.com/http/ssl-certbot.html
Let’s Encrypt 签发ECC证书
椭圆曲线密码学(Elliptic curve cryptography,缩写为ECC),一种建立公开金钥加密的算法,基于椭圆曲线数学。椭圆曲线在密码学中的使用是在1985年由Neal Koblitz和Victor Miller分别独立提出的。
内置 ECDSA 公钥的证书一般被称之为 ECC 证书,内置 RSA 公钥的证书就是 RSA 证书。由于 256 位 ECC Key 在安全性上等同于 3072 位 RSA Key,加上 ECC 运算速度更快,ECDHE 密钥交换 + ECDSA 数字签名无疑是最好的选择。由于同等安全条件下,ECC 算法所需的 Key 更短,所以 ECC 证书文件体积比 RSA 证书要小一些。
ECC 证书不仅仅可以用于 HTTPS 场景当中,理论上可以代替所有 RSA 证书的应用场景,如 SSH 密钥登陆、SMTP 的 TLS 发件等。
购买证书需要的CSR请求用openssl创建csr和pkey方法:
1 | $ openssl ecparam -out ecc.zmq100.cn.ecc.pkey -name prime256v1 -genkey |
1、创建目录,到目录里。
1 | $ mkdir ecc && cd ecc |
2、下载acme.sh到本地
1 | $ wget https://ghproxy.net/https://github.com/acmesh-official/acme.sh/blob/master/acme.sh |
Debug Nginx-ingress-controller
背景
使用nginx-ingress遇到backends不更新的问题,在修改svc的 targetPort之后nginx-ingress的backends不能正常更新成新的targetPort。
关于endpointslices,是k8s 1.16 引入的新feature , 目的就是当客户端去get一个很大的endpoint的list的时候可能存在的卡顿,解析资源比较大引发的问题。 所以社区引入endpointslices 资源, 把大的endpoint 分片成很多100个端点块的资源,通过kcm的 --max-endpoints-per-slice 参数调整块大小。
新feature是有很多的问题的,比如kube-proxy 是在1.20之后再引入去获取 endpointslice,看社区出现过一个在使用ExternalName 导致的bug, 在1.23之后的k8s版本中修复了, 类似issue: https://github.com/kubernetes/kubernetes/issues/105986
nginx-ingress-controller 看是在 v1.9.0 之后引入使用的 endpointslices
https://github.com/kubernetes/ingress-nginx/commits/controller-v1.9.0/internal/ingress/controller/endpointslices.go
https://kubernetes.io/zh-cn/docs/concepts/services-networking/endpoint-slices/
https://github.com/kubernetes/kubernetes/commit/75f6c249235b40b24e9ea1efdb1ff81dd76a8d68
https://kubernetes.io/docs/reference/command-line-tools-reference/kube-controller-manager/
OrangePi 安装k8s
准备环境
规划
| 软件 | 版本 | 组件 | 部署方式 |
|---|---|---|---|
| 操作系统 | Ubuntu 22.04.4 LTS | containerd | 二进制 |
| 运行时 | Containerd 1.7.20、runc 1.1.13 | kubelet | 二进制 |
| crictl | v1.28.0 | ETCD | manifests |
| Kubernetes | v1.28.12 | KCM | manifests |
| etcd | 3.5.12-0 | APIserver | manifests |
| coredns | 1.9.4 | Scheduler | manifests |
| cilium | v1.16.0 | Coredns | deployment |
| metrics-server | v0.7.1 | metrics-server | deployment |
| istio | 1.22.3 | kube-proxy | DaemonSet |
orangePi 初始化
1 | orangepi-config |
[optional]配置网络等: https://github.com/wukongdaily/OrangePiShell
OrangePi 禁用交换分区的方法
https://blog.csdn.net/Atticus_zhang/article/details/132888408
禁用OrangePi开发板交换分区,需要先关闭开发板 linux 系统的 orangepi-ramlog 和 orangepi-zram 服务。
1 | $ sudo sed -i "s/ENABLED=true/ENABLED=false/" /etc/default/orangepi-ramlog # 关闭 orangepi-ramlog |
1Panel
1 | curl -sSL https://resource.fit2cloud.com/1panel/package/quick_start.sh -o quick_start.sh && sudo bash quick_start.sh |
docker 镜像拉取
创建一个新的repository
略
在新仓库创建一下阿里云个人版账号密码
Settings --> Actions secrets and variables --> Actions --> Repository secrets
创建如下两个secrets 填写个人版本镜像拉取账号密码
Key如下 REGISTRY_USERNAME和REGISTRY_PASSWORD
kubectl 自动补全
https://kubernetes.io/zh-cn/docs/tasks/tools/install-kubectl-linux/#enable-shell-autocompletion
1 | 其他版本,以下oss地址替换如下: |
下载
1 | $ wget -q --no-check-certificate -O kubernetes-1.26.3-aliyun.1-linux-amd64.tar.gz \ |
配置自动补全
1 | $ yum install bash-completion |
ssh心跳
1 | $ vim /etc/ssh/ssh_config |
docker多平台构建
docker多平台构建像参考文档:
https://docs.docker.com/build/building/multi-platform/
安装docker
一键安装
1 | $ sudo curl -fsSL https://get.docker.com | bash -s docker --mirror Aliyun |
二进制安装docker
https://download.docker.com/linux/static/stable/
https://download.docker.com/linux/static/stable/x86_64/docker-24.0.7.tgz
docker 安装
1 | $ wget https://download.docker.com/linux/static/stable/x86_64/docker-24.0.7.tgz |